Photography is a fun way to capture moments and tell stories through pictures. To become a better photographer, you need to understand some basic ideas, especially exposure. Exposure is all about how light works with your camera, which affects how bright or dark your photos are. By learning how to control exposure, you’ll be able to take great pictures no matter the lighting. Whether you’re photographing landscapes, people, or action shots, knowing these basics will help you improve your skills and unleash your creativity
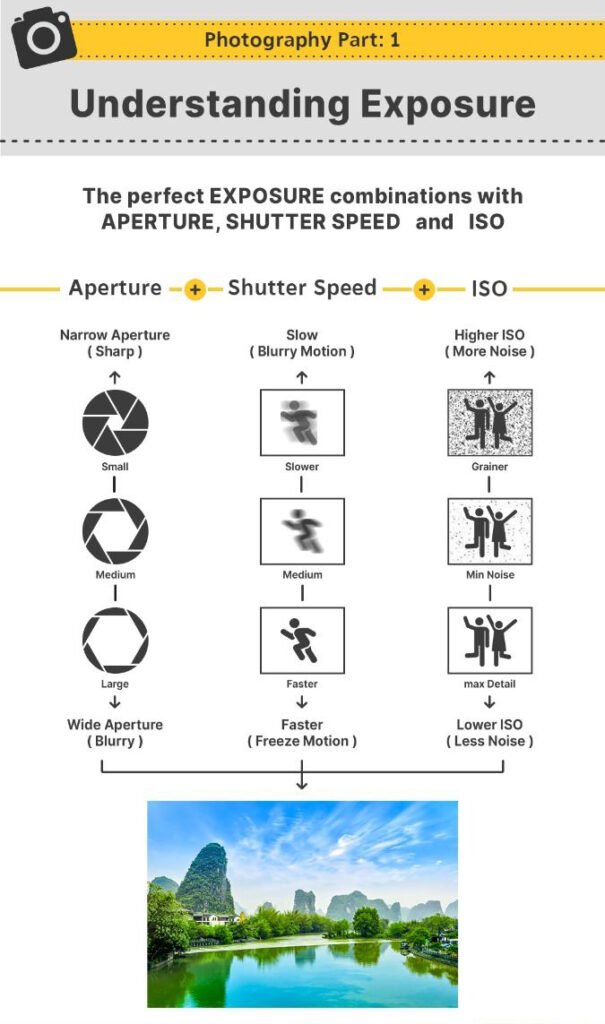
To achieve perfect exposure in photography, you need to balance three important settings: aperture, shutter speed, and ISO. Aperture controls how much light enters the camera, shutter speed determines how long the light hits the sensor, and ISO adjusts the camera’s sensitivity to light. Together, these elements work to create images that are bright, clear, and visually appealing, no matter the lighting conditions. Mastering this balance helps you capture the best possible photos!

Aperture is one of the most important settings in photography, playing a critical role in controlling the amount of light that enters your camera and shaping the look of your final image. Think of aperture as the window of your camera’s lens. Just like a window controls how much light comes into a room, the aperture controls how much light enters the camera.
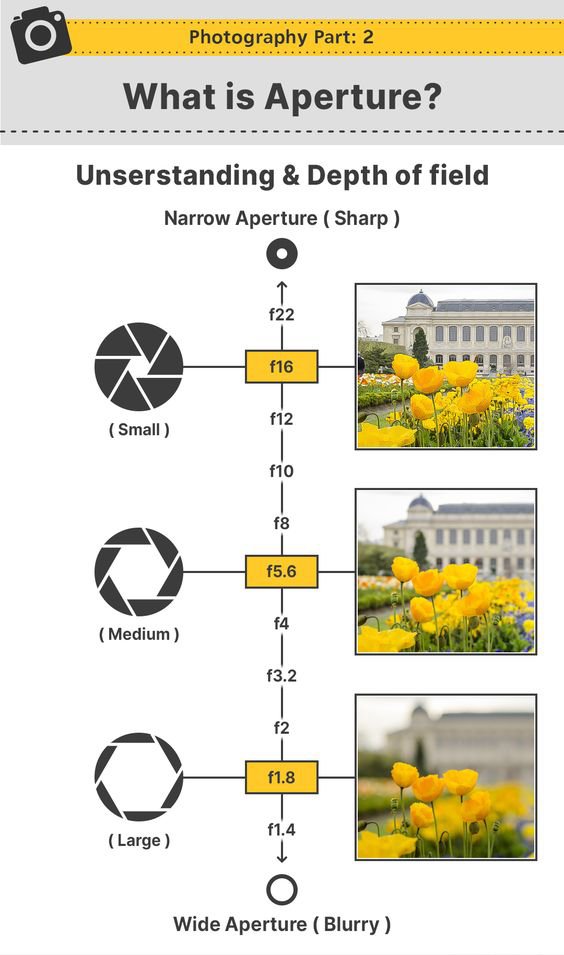
The aperture is measured in f-stops (like f/1.8, f/4, f/16), and each number represents a different size of the lens opening. The lower the f-number, the wider the aperture; the higher the f-number, the narrower the aperture.

1. Wider Aperture (Low f-number)
2. Medium Aperture (Mid-range f-number)
3. Narrow Aperture (High f-number)
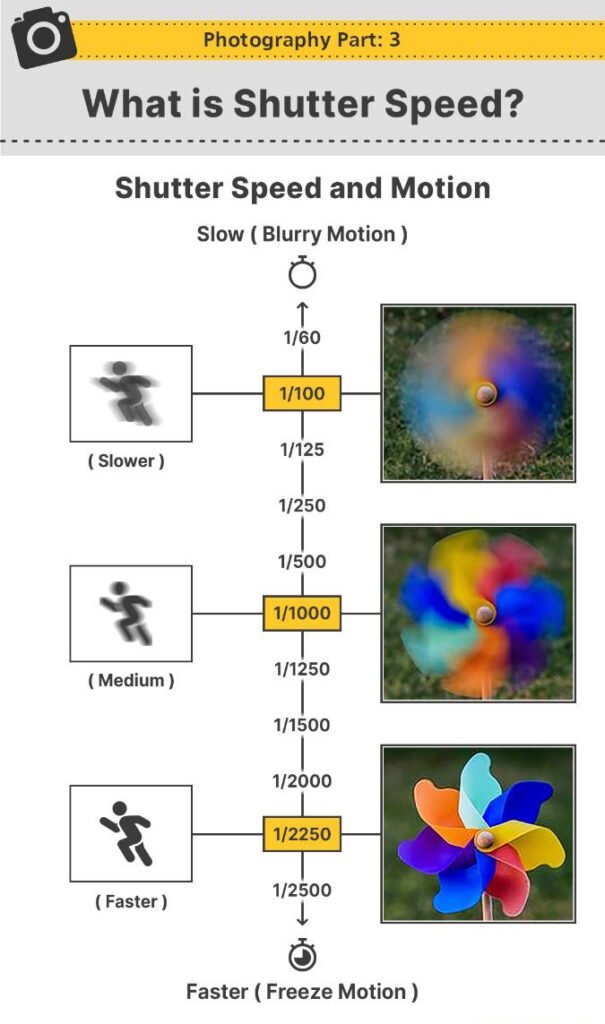
Shutter speed is a crucial camera setting that determines how long the camera’s shutter remains open when capturing an image. This setting influences how motion is represented in your photos, affecting everything from the clarity of a still subject to the blur of moving objects. A faster shutter speed captures quick movements crisply, while a slower shutter speed introduces motion blur, adding a dynamic feel to the image. Understanding how to manipulate shutter speed allows photographers to creatively express movement and control the overall impact of their photographs.

1. Slower Shutter Speed (Blurry Motion)
2. Medium Shutter Speed
3. Faster Shutter Speed (Freeze Motion)
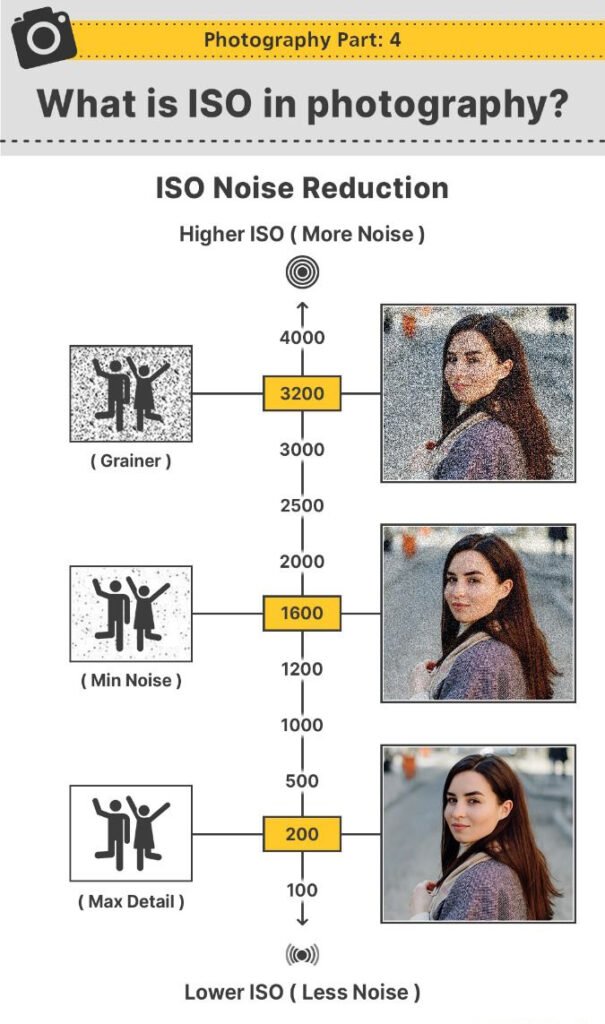
ISO is a key setting in photography that controls your camera’s sensitivity to light. By adjusting the ISO, photographers can influence the brightness of their images while also impacting the level of noise or grain. A lower ISO produces cleaner, high-quality images, while a higher ISO allows for brighter photos in low-light conditions but may introduce unwanted noise.

1. Higher ISO (Grainier)
2. Medium ISO (Min Noise)
3. Lower ISO (Max Details)
Understanding exposure is really important for anyone who wants to get better at photography. By learning how to balance aperture, shutter speed, and ISO, you can control how light enters your camera and create beautiful images that match your creative vision.
Whether you’re taking pictures in bright sunlight or low-light settings, knowing how to adjust these settings will help you capture the moment clearly and perfectly. Don’t be afraid to try different combinations—practice is the best way to figure out what works for you. Over time, adjusting exposure will feel natural, opening up new ways to express your creativity in photography. Keep practicing and enjoy the process!